
Inserting & Selecting Tables
Open Publisher treats tables as interactive, movable canvas elements, offering multiple ways to build grids from scratch or import existing data.
Inserting Tables
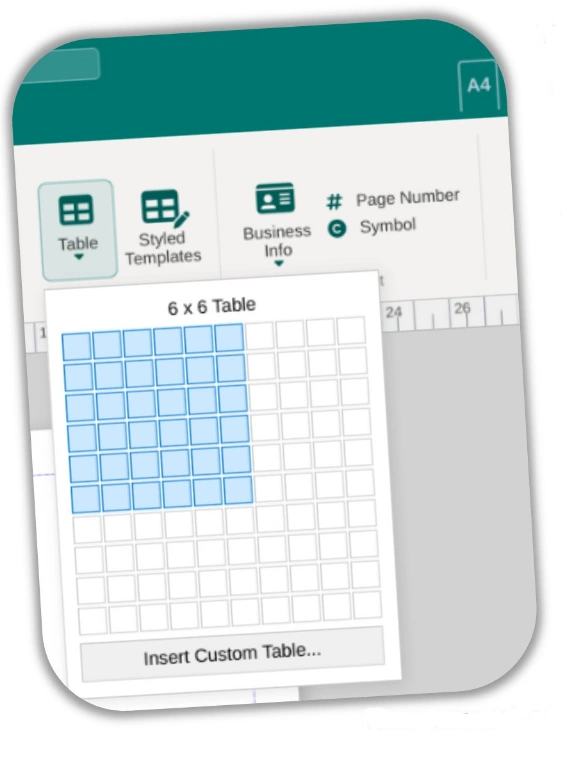 Tables can be inserted in several ways:
-
Standard Grid: Go to Insert > Table and drag over the grid to select the number of rows and columns you want. Release to insert.
-
Styled Table Templates: Click Insert > Styled Templates to open the 100-layout template browser. Here you can choose from a library of beautifully pre-formatted table designs with colour themes and border styles already applied. Double-click any template to insert it.
-
Right-Click Context Menu: Right-click anywhere on the canvas and hover over Insert… to access both a standard Table and Styled Tables option directly.
-
Drag-and-Drop Excel Spreadsheet: Drag a .xlsx or .xls file from your desktop directly onto the canvas. An Import Wizard appears (see below).
Importing Excel Spreadsheets
Open Publisher can import .xlsx and .xls spreadsheets directly onto the canvas by dragging and dropping the file from your desktop. Dropping a spreadsheet triggers the Import Spreadsheet Wizard, which presents two processing modes:
Styled Data Mode (ExcelJS – .xlsx only)
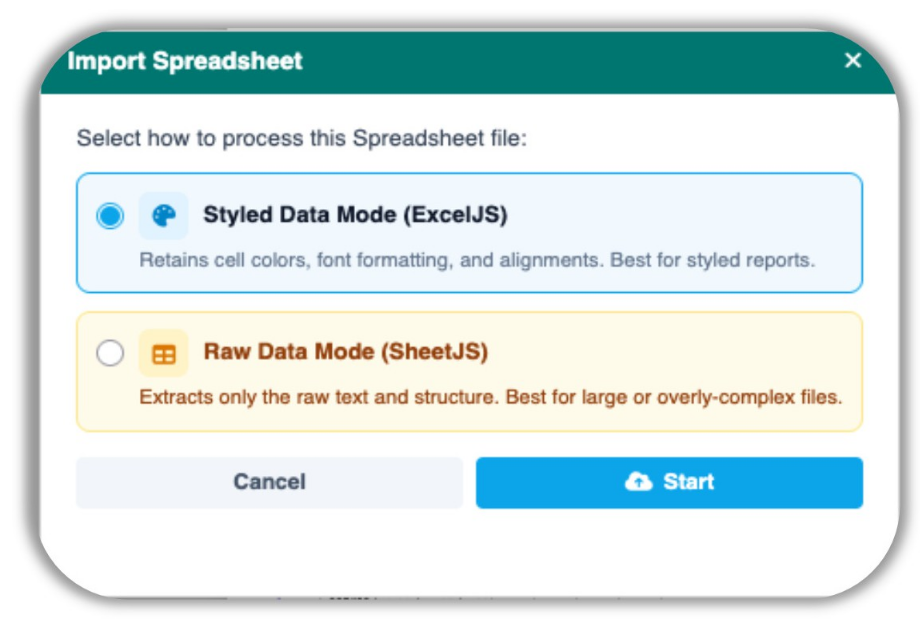 The high-fidelity parser reads through your cells and translates Microsoft’s internal colour codes into standard web CSS. This allows you to perfectly retain:
-
Background cell colours
-
Font colours
-
Bold and italic formatting
-
Custom text alignment
Raw Data Mode (SheetJS)
A robust secondary parser that extracts the raw text and structure of your spreadsheet without any formatting. Use this if you want a clean, neutral-styled table, or if you are importing a legacy .xls file (which does not support the Styled Data Mode).
The wizard features intelligent safeguards: if you drop a legacy .xls file that does not support styling extraction, the Styled Data Mode option is automatically dimmed to prevent errors. Once imported, the spreadsheet is rendered as a fully interactive, movable, and resizable table object. Because table cells retain their contenteditable attributes, you can click directly into the imported data to fix typos or update values on the fly.
The Table Design Ribbon & Layout Sidebar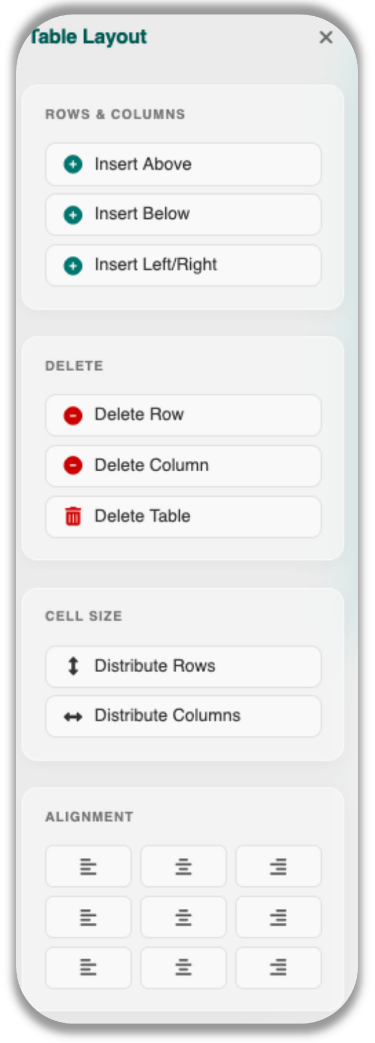
Clicking into any table activates the Table Design contextual ribbon at the top of the screen and simultaneously opens the Table Layout sidebar on the right-hand side of the workspace.
-
Table Design ribbon: Controls borders (colour, thickness), cell shading (fill colour), and table-wide styles.
-
Table Layout sidebar: Contains insert/delete row and column controls, distribute rows and columns tools, and the 9-way cell alignment grid. The sidebar uses the same frosted-glass, card-based aesthetic as the Image and WordArt formatting panels.
Selection Mechanics
Multi-Cell Selection
Click and drag your mouse across a group of cells to highlight them. Selected cells are shown with a light blue .op-selected-cell highlight. You can then apply border colours, fill colours, or line spacing to the entire highlighted group in one action.
One-Click Select-All Handle
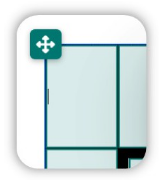 Whenever you hover over any table on the canvas, a small floating four-way arrow handle appears just outside the top-left corner of the table. Clicking this handle instantly highlights every cell in the table and switches your ribbon to the Table Layout and Table Design tools, ready for bulk formatting. The handle disappears automatically when you move the mouse away or start dragging other elements, keeping your workspace uncluttered.